

Using your own Linux gear, you can block ads throughout the whole network.

While internet advertising is an important source of revenue
for many businesses, including mine (https://shopmakergenix.blogspot.com/),
some individuals choose to avoid it for a number of reasons, including worries
about performance and privacy. You may either use ad-blocking software on each
of your devices or utilize more efficient alternatives like Pi-hole. Pi-hole is
a network-wide ad-blocker that can be installed on a Linux-based device to
create a server that filters all of your online traffic and blocks adverts on
any device connected to your home network. Without the need for individual
device settings, it protects your network against advertisements and trackers.
Unlike browser add-ons, Pi-hole can block ads on any network device (such as
smart appliances), and unlike browser add-ons, it can also block advertisements
on any programme. We'll show you how to set up a Pi-hole on a Raspberry Pi Zero
in this lesson from the Raspberry Pi Zero Series. On a Raspberry Pi Zero 2 W,
let's make a Pi-hole. But first, let's define Pi-hole and how it works to stop
advertisements.
What exactly is a Pi-hole, and how does it work?
Pi-hole is a network-wide ad blocker based on the Raspberry
Pi. It's simple to set up on the Raspberry Pi Zero by performing certain
installation instructions on a Raspberry Pi running Raspberry Pi OS. Once
Pi-Hole is setup, you may configure your devices to utilize its IP address,
directing all traffic via it. When a website (that serves advertisements)
requests the domain of its ad servers to receive an ad, Pi-hole compares the
domain name to its list of banned ad-servers.
Then, to begin blocking advertising straight immediately,
redirect computers to the Raspberry Pi's IP address. We can also add your favorite
websites to a whitelist, which we highly encourage you to do to help them keep
the lights on.
Pi-hole is a Linux network advertising and Internet tracker
filtering application that also serves as a DNS sinkhole and DHCP server for
usage on a private network. It's intended for low-power embedded devices with
network capability, like the Raspberry Pi, although it can operate on any Linux
machine. Pi-hole has the ability to block both traditional internet adverts and
ads located in odd locations like smart TVs and mobile operating systems.
You must first make your Raspberry Pi zero W's IP address
static before installing Pi-hole. To make your Raspberry Pi zero W IP address
static, follow the instructions below.
1-
In a terminal window, type the following
command, and then modify the dhcpcd.conf file. If your Raspberry Pi Zero 2 W and
router/mobile are linked through Ethernet cable, remark interface wlan 0 lines;
if your Raspberry Pi Zero 2 W and router/mobile are connected via Wi-Fi, comment
interface eth0 lines.
sudo nano /etc/dhcpcd.conf
2-
Because we're utilising a mobile hotspot as a
router, we'll use the wlan0 interface lines. We'll type a few lines here, save
the file with ctrl+X, and then hit Y to quit.
·
Static IP address — This is the IP
address you'd want to assign to your device. (Don't forget to include the /24
at the end.)
·
Static Routers — This is your gateway's
IP address (router IP address)
·
domain name server static - It's the DNS
server's IP address (router IP address). Multiple IP addresses can be written
here, separated by a space.
3-
Use the sudo reboot command to reboot your
Raspberry Pi Zero, and then use the command ifconfig to check the IP address of
your Raspberry Pi Zero W.
Sudo reboot
Ifconfig
The IP address of the Raspberry Pi Zero W
is now static.
Pi-hole installation on a Raspberry Pi Zero W
We'll now install pi hole on the Raspberry
Pi Zero W. To install pi hole on the Raspberry Pi Zero, we will follow the
instructions outlined below.
·
To update and upgrade your Raspberry Pi Zero W,
use the instructions shown below. It will take around 30 minutes, depending on
your internet speed.
sudo apt update
sudo apt upgrade –y
·
Run the command below to install pi hole. This
script will download and install the Pi hole in terminal. After you've
installed the Pi hole, a popup will pop up, and you'll need to hit Ok in that
window. After the static IP required dialogue appears, click Yes because we
have already set the IP address for our Raspberry Pi Zero W to be static.
·
Decide on a provider for your upstream DNS
service. We'll type Google into the search box, then hit Tab, then Enter.
·
To accept the default list of forbidden sites,
press Tab and Enter.
·
You accept the default IPv4 and IPv6 protocols
by hitting Tab and Enter.
·
Accept the current network setup and set it to
static, as well as your IP address and gateway, which we'll need later.
·
Install the web admin interface by hitting Tab
and Enter.
·
Install the lightppd web server, which will give
the web admin pages, by pressing tab and entering.
·
You accept the default privacy mode by pressing
tab and entering.
·
The installation process will now begin,
followed by the appearance of an installation window.
·
Now that the installation is complete, we'll
update the password for the pi hole using the command below.
pihole -a –p
Connecting the Pi-hole to the Internet
On our Raspberry Pi zero W, we
installed Pi-hole. Now we must point our devices to it in order for the Pi-DNS
hole's servers to ban intrusive advertisements. We're manually setting a wired
network connection on Windows 10. The instructions will be the same for Wi-Fi.
1-
Switch on your computer's network connection.
2-
To adjust the network setup, click the edit
button, then manual, then save.
3-
Any address entered in the IP address area
should not be the same as the IP address of the Raspberry Pi or the router. You
can alter the final digit of the Raspberry Pi's IP address and write it here.
Put 24 in the subnet prefix length field, your router's IP address in the
gateway field, and the raspberry pi zero's IP address in the preferred DNS
field and 8.8.8.8 in the alternate DNS field.
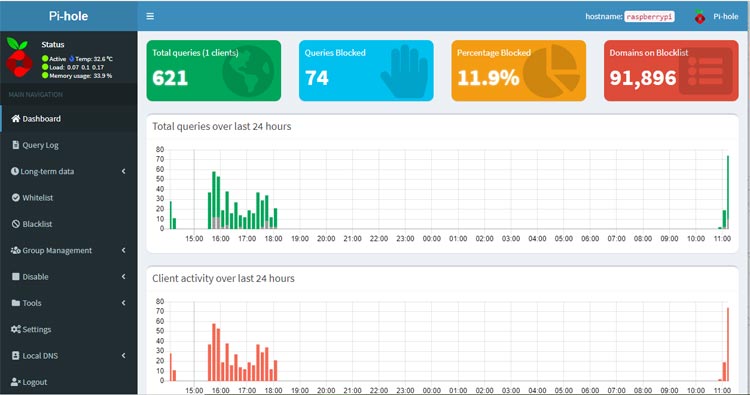
4- Now, open a web browser on your computer and type in the IP address of your Raspberry Pi, followed by an admin ending, such as http:// 192.168.198.38/admin/. The Pi-hole web page will appear in your browser.
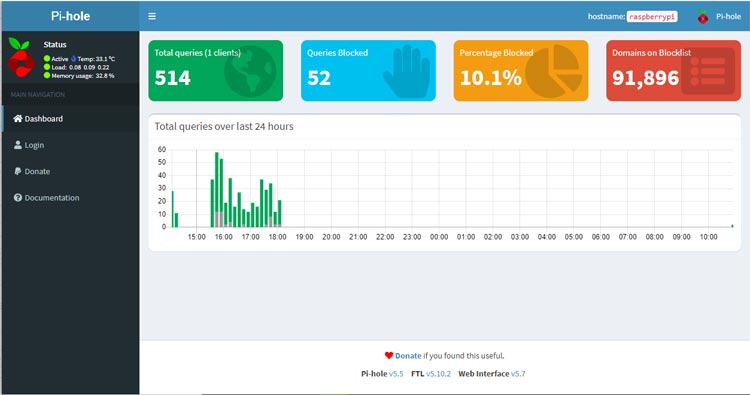
5- Select Login from the drop-down menu and enter your password.
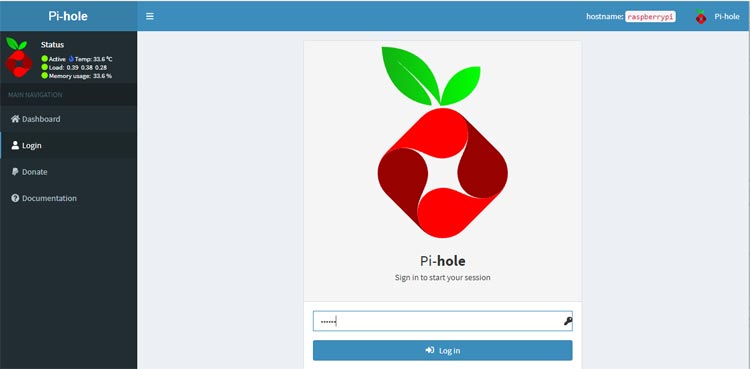
6- Your dashboard will open, and you will be able to access all of your information. The UI of the dashboard, as well as all information regarding blocking and graphs, may be seen in the photos below.
The Raspberry Pi Zero Pi-Hole
configuration is now complete. You may use the whitelist option to support a
website so that they can display your advertisements. You can enter the URL of
that site here, and ads from that site will not be prohibited.
This concludes the installation ofPi-hole on the Raspberry Pi zero 2 W. I hope you enjoyed the assignment and
gained some important knowledge.
Posts You May like:
- Uninterruptible Power Supply UPS HAT For Raspberry Pi
- A hidden speed boost and a 64-bit option are included in the new #RaspberryPi #OS
- Using the On-Board Bluetooth on the Raspberry Pi 4 for Communication
- #ArduinoIDE 2.0 Release Candidate (RC)
- Armbian Linux on the Raspberry Pi 4: A First Look
- NeoPixel Christmas Tree Lights Controlled by a Raspberry Pi
- What Type of LoRa Modules are Available?
- Introducing The VisionFive V1 is a RISC-V Based Raspberry Pi Replacement - Available Soon
- Raspberry Pi Zero 2 W Overclocking - Boost Up To 1.2GHz, or even 1.4GHz
- The Arduino UNO Mini Limited Edition is Now Available
- Scan QR Codes with Raspberry Pi Pico
- Create Barcodes with Pure Python
- The New Version of Raspberry Pi OS, Debian "Bullseye" is Now Available.
- The Raspberry Pi Zero 2 W Arrives Six Years After The First Pi Zero
- Raspberry Pi 4 Has Been Given Vulkan 1.1 Compliance by Khronos
- The Raspberry Pi Build HAT - Complete Guide
- Raspberry Pi Officialy Announced Build HAT For Raspberry Pi
- Installing Android on a Raspberry Pi 4 with Google Play Store
- Pop OS Linux is Coming to Raspberry Pi and Other ARM Devices Soon
- How to Immediately Upgrade to Windows 11
- A Secret Update for the Raspberry Pi 4 8GB
- Raspberry Pi Introduces a New Documentation Hub
- Quick start with ESP8266 based Pico WiFi HAT
- Capture local Real-Time Air Quality Data with Raspberry Pi Pico


.png)


