

Send phone notifications Using Raspberry Pi Pico - Tutorial

We demonstrate how to connect Pico to WiFi while keeping its power consumption low and running it only on AAA batteries.
We demonstrate how to connect the Raspberry Pi Pico to WiFi using the Cricket WiFi module and send an alarm to our phone in this project. We also show why utilising Cricket would make WiFi networking so energy-efficient that our gadget may run for months or perhaps years on a single battery.

To keep things simple, we build a Python programme that flashes the LED light on the Pico board every 5 minutes. When the LED blinks, Cricket is told to send a notice to our phone.
Blynk was chosen to deliver notifications since it is a user-friendly and dependable multi-platform mobile app. It can, however, be any other internet service or local network system that you like. We can use the MQTT or HTTP(S) protocols to connect our gadget to practically any software without having to configure it.
Using this project, we hope to provide a resource for anybody interested in building IoT devices with a variety of sensors, including cameras and even more complex peripherals. We could wish to conduct more complex local compute processing and logic, such as machine learning inference on pictures or audio, instead of flashing LEDs.
𝟏𝟐 𝐃𝐚𝐲𝐬 𝐋𝐞𝐟𝐭!!!
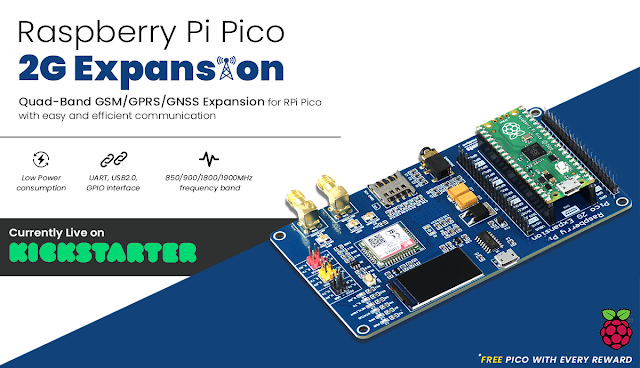
— SB Components Ltd (@sb_ltd) August 10, 2021
𝐑𝐚𝐬𝐩𝐛𝐞𝐫𝐫𝐲 𝐏𝐢 𝐏𝐢𝐜𝐨 𝟒𝐆 𝐄𝐱𝐩𝐚𝐧𝐬𝐢𝐨𝐧 - 𝐊𝐢𝐜𝐤𝐬𝐭𝐚𝐫𝐭𝐞𝐫
Check Now: https://t.co/xaT4mA8kuU
#kickstartercampaign #Pico2G #Pico4G #raspberrypi pic.twitter.com/m8e5TIrSGD
We may create complex gadgets and systems as a result of this, such as a security alarm system for our home, as an example.
If you want something more specialised and power efficient, you might want to look at other microcontrollers than Pico in the future. Pico, on the other hand, is excellent for quick prototyping and getting things done almost instantly.
Raspberry Pi Pico Programming
The Raspberry Pi Pico is a small, low-cost computer that can be used to create a variety of devices by connecting peripherals to it. It's a versatile RP2040 microcontroller with flexible digital interfaces and excellent software support, making coding and programming such little boards a breeze. It does not, however, come with WiFi connectivity. The good news is that it's quite simple to extend it with WiFi without sacrificing power economy, as we show in this project. (For additional information, see to the official Raspberry Pi Pico page.)
If you're new to Pico, we strongly advise you to start with our fantastic Getting Started with Raspberry Pi Pico guide.
The techies over at @sb_ltd have launched a crowdfunding campaign which gives the @Raspberry_Pi Pico a 2G GSM modem - plus Bluetooth, a small display, GNSS, and a range of other bonus features. https://t.co/yK5WzFX6UC
— Gareth Halfacree (@ghalfacree) July 27, 2021
Now we'll build a Python programme that will flash LED lights on the Pico board and send a signal to Cricket, causing it to connect to the internet through WiFi and send a notice to our phone.
To do this, we create a "foo" function, which is invoked at a 5-minute interval using Timer. The "foo" function performs you need sets Pin15 as an OUT for 0.8 second with the value = 1 blinks the built-in LED (Pin25) for 0.8 second.
The Cricket WiFi module uses the Pin15 to raise a signal. When the pin is set to 1, Cricket is awakened and a request is sent to Blynk. We'll teach you how to customise it later. Cricket is turned off fully when the Pin15 is set to 0. Pico's WiFi connection is turned off and does not cost any energy while it performs its software. It is only activated when it is required.

Below is a complete program:
main.py
from machine import Pin, Timer import time led = Pin(25, Pin.OUT) cricket = Pin(15, Pin.OUT) timer = Timer() def foo(timer): led.value(1) cricket.value(1) time.sleep(0.8) led.value(0) cricket.value(0) # The freq = 0.00333 represents 5 minutes interval timer.init(freq=0.00333, mode=Timer.PERIODIC, callback=foo)
Please notice that the above programme is saved to Pico's main.py file. It has to be main.py since we want Pico to be able to operate it off of batteries (instead of USB).
Now we can put our software to the test. To test if the LED blinks every 5 minutes, we unplug the USB and reconnect the battery. Let's go on to the next stage if it does.
Download and install the Blynk app.
What exactly is Blynk? Blynk is a multi-platform mobile software that allows you to receive data and operate microcontrollers over the Internet using your iPhone or Android phone. It comes with a digital dashboard where we may drag and drop widgets to create a graphic interface for any project. (For additional information, visit the official Blynk website.)
To begin, we must first download and install the Blynk software on our phone. Let's choose the best option for our phone: iOS or Android
We must configure it once it has been installed. Open Dashboard settings and select "Wi-Fi" as the connection type for the "Generic Board" device. After you've finished creating it, click the Email button to send an email containing a unique authentication token. This token will be required in order for Cricket to deliver alerts to our phone.
Let's now add a Notification widget to our Dashboard and activate it by pressing the Play button in the upper right corner.
That's it! Notifications are now available in our app.
Before moving on to the next stage, we can see if it works by using the "curl" command:
curl -X POST "http://blynk-cloud.com/YOUR_KEY/notify" -H "Content-Type: application/json" -d '{"body":"Hello from Curl!"}'Cricket Configuration
IOT Cricket is a simple to use ultra-low power WiFi module that can run for an extended period of time on batteries (for years in many use cases). Simply connect a sensor and a battery, and the gadget is ready to broadcast data through WiFi networks in real time.
First, let's get Cricket connected to our WiFi network:
- For 5 seconds, press and hold the built-in Cricket's button (this activates the toe device hotspot).
- From a phone or laptop, connect to the "toe device" hotspot.
- Please enter your WiFi password: Enter the SSID and password, then hit the CONNECT button.
Please check Cricket's documentation for further details.
Cricket is used in this project to have Pico deliver notifications to our phone. Cricket is set up such that every time it wakes up, it connects to WiFi and sends an HTTP POST request to Blynk. The notice is then sent to our phone via Blynk.
When a voltage arrives on the WAKE UP pin, Cricket wakes up. Because Pin15 on our Pico is connected to Cricket's WAKE UP pin, setting it to "1" boosts the voltage and wakes Cricket awake.
Let's set up Cricket using the following parameters:
- CONNECTIVITY > type: HTTP_POST
- CONNECTIVITY > url: http://blynk-cloud.com/YOUR_KEY/notify
- CONNECTIVITY > payload: {"body":"Hello from Pico!"}
- CONNECTIVITY > content-type: application/json
- IO1 > force update: On
This is an example of a configuration:
That's it. We may quit the settings by pressing the switch off button in the upper right corner, and our gadget will be ready to use!
It's time to connect all of the pieces!
Assemble and test the boards
We'll power both the Pico and Cricket boards separately from the AAA batteries so that they have their own power sources.
NOTE: In some situations, we may wish to consider running Pico on Cricket 3v3. This would increase electricity efficiency even more. It's worth thinking about for future initiatives.
Now it's time to put everything together and put it to the test.
- Connect the batteries to Pico and connect a yellow cable to Pin15.
- Connect the same yellow cable to the WAKE UP pin on Cricket.
- Connect the batteries to Cricket.
The following is an example of a finished project:
Of course, by soldering components together, we may shrink it to a much smaller size. However, in this project, we want to demonstrate how all of the components fit together.
The project should be up and running automatically after the assembly and connection of the battery. The Pico board should flash LED every 5 minutes, waking up Cricket and allowing it to send notifications to our phones via Blynk.
Using the Cricket WiFi module, we demonstrated how to create IoT projects with the Raspberry Pi Pico and link them into a vast ecosystem of applications and internet services. We used Blynk to show the integration, but the same principles apply to any other programme and internet service that uses MQTT or HTTP (RESTfulApi).
This project serves as a foundation for more complex devices to be built upon. Instead of just a flashing LED, we may utilise Pico to connect more complex sensors (I2C, SPI, UART, etc. ), do local processing, and then use Cricket to broadcast warnings or notifications as needed. What's more cooler is that our gadgets can connect directly to WiFi networks without the use of proprietary IOT hubs, and they can run for a long period on a single battery.
Thank you for making it this far. We hope you found this guide helpful!
Posts You May like:
- Raspberry Pi Pico 4G/2G Expansion : Expectations vs. Reality
- Quick Example to Drive Servo Using Programmable I/O
- How to Use a USB SSD or Flash Drive to Boot a Raspberry Pi 4 / Pi 400
- Filter Ads by your Raspberry Pi Before they Reach your Devices
- A Raspberry Pi 4 Model A Launch 2022 - Eben Upton
- First-Ever 2G Expansion Board for Raspberry Pi Pico has Launched on Kickstarter
- Learn IoT "Internet of Things" with 24 lessons for Teachers and Students
- Quick Guide for Raspberry Pi Users: Raspberry Pi Terminal Commands
- Windows 11 on Raspberry Pi Devices in Easy Installation Guide
- Get Your Project Done by Raspberry Pi Approved Design Partners
- PiRelay 8 Smart Relay Board for Raspberry Pi - Kickstarter
- Tiny Round/Circular LCD Display Launched!
- Issue Fixed! USB Boot Ubuntu Server 20.04 on Raspberry Pi 4
- HC-SR04 Sensor with micro-ROS on the Raspberry Pi Pico
- Raspberry Pi Pico: ADC Sampling and FFT
- Using CircuitPython for RP2040
- How to Setup Pico RP2040 on Windows
- Using micro-ROS on the Raspberry Pi Pico
- LED Tricks Using The Raspberry Pi Pico
- The RP2040 Raspberry Pi Pico Meets LoRa
- Pico supports SD cards and FatFS
- How to connect a Raspberry Pi Pico to LoRaWAN
- 50 Raspberry Pi Hacks & Tips You Should Know
- How to Install Wi-Fi and Internet on a Raspberry Pi Pico


.png)


