Raspberry Pi Pico Development on M2 Mac, This project demonstrates how to begin working with the Raspberry Pi Pico's command line interface on an M2 Mac.
I recently purchased a new MacBook Air with the newest M2 chip, but I still wanted to start experimenting with what it would be like to work on an ARM-based host system even though I won't be completely switching away from my x86 MacBook Pro anytime soon (still navigating the complicated world of emulators).
start on my new M2 Mac would be to install the required command-line tools for compiling and uploading code to an RPi Pico.
Another thing that struck me was how often I neglect to treat my Mac OS host like a Linux OS host. And yes, I am aware that Mac OS has modified certain aspects, such as its proprietary file system, but philosophically, approaching Mac OS is quite similar to approaching a new Linux distribution. Because ultimately it still boils down to the fundamentals: selecting the proper package management and locating the correct source code to assemble whichever program or utility you want.
The following prerequisites must be met in order to build and upload programs to the RPi Pico in this case:
- The RPi Pico application source code may be cross-compiled using the GNU ARM toolchain.
- A Mac OS package manager for installing necessities like CMake
- The sample application source code repository for the RPi Pico SDK.
Set up the GNU ARM Toolchain.
Because the GNU ARM toolchain very explicitly specifies that it only supports x86 host computers at the present, I was first perplexed as to how I was going to install it. However, Rosetta 2 from Apple pleasantly pleased me in this regard, and everything went well when I took a wild stab at it by downloading the installer for Mac OS from ARM's website and running it.
Choose the most recent, non-beta version of the GNU ARM toolchain installer for Mac OS from ARM's website here (which was 11.3.Rel1 at the time of writing). By double-clicking a arm-gnu-toolchain-11.3.rel1-darwin-x86_64-arm-none-eabi.pkg in the Downloads folder, the installation package may be started. After that, just carry out the instructions provided by the installer GUI.
As a consequence, /Applications/ArmGNUToolchain receives the installation of the ARM toolchain. It is crucial to remember that on Mac OS, the folders /Applications and ~/Applications are NOT the same. Because of this, you need to exercise caution later on when establishing environment variables for other things, including the RPi Pico SDK.
Get a package manager installed (Homebrew)
Mac OS does not come pre-installed with a command line package manager. Despite the fact that there are many choices, MacPorts and Homebrew have always been favorites of mine. Since some code bases support one better than the other, I often keep both installed. Homebrew now seems to function a little better with the M2 Macs, so I'm going with that here.
Download the Homebrew source code, then use curl to launch the install script:
whitneyknitter@Whitneys-Air ~ % /bin/bash -c "$(curl -fsSL https://raw.githubusercontent.com/Homebrew/install/HEAD/install.sh)"
Following a successful installation, the script will print out instructions for the commands you must issue to configure your system's environment variables in order to utilize Homebrew. For me, this appeared as follows:
whitneyknitter@Whitneys-Air ~ % echo '# Set PATH, MANPATH, etc., for Homebrew.' >> /Users/whitneyknitter/.zprofile
whitneyknitter@Whitneys-Air ~ % echo 'eval "$(/opt/homebrew/bin/brew shellenv)"' >> /Users/whitneyknitter/.zprofile
whitneyknitter@Whitneys-Air ~ % eval "$(/opt/homebrew/bin/brew shellenv)"
It's a good idea to test out Homebrew after the required environment variables have been configured using something like the help flag:
whitneyknitter@Whitneys-Air ~ % brew help
Install CMake
Installing CMake is the final prerequisite before we can begin creating C apps for the RPi Pico. This is fairly easy to do using Homebrew:
whitneyknitter@Whitneys-Air ~ % brew install cmake
Then, run CMake with the help flag to confirm that it was installed correctly:
whitneyknitter@Whitneys-Air ~ % cmake --help
Put in the RPI Pico SDK.
Create a directory to clone the RPi Pico repositories into, maybe in your home directory ():
whitneyknitter@Whitneys-Air ~ % mkdir -p rpi_pico
whitneyknitter@Whitneys-Air ~ % cd ./rpi_pico
NOTE: The Mac Home directory () can be used in the same way as the Linux Home directory ().
Put the most recent version of the RPi Pico SDK in the directory by cloning it:
whitneyknitter@Whitneys-Air rpi_pico % git clone -b master https://github.com/raspberrypi/pico-sdk.git
whitneyknitter@Whitneys-Air rpi_pico % cd pico-sdk
whitneyknitter@Whitneys-Air pico-sdk % git submodule update --init
whitneyknitter@Whitneys-Air pico-sdk % cd ../
RPi Pico Examples Install
Clone the RPi Pico examples repository and download its most recent version as well after switching back into the top-level directory (where the SDK was copied, which in my case is /rpi pico):
whitneyknitter@Whitneys-Air rpi_pico % git clone -b master https://github.com/raspberrypi/pico-examples.git
whitneyknitter@Whitneys-Air rpi_pico % cd pico-examples
whitneyknitter@Whitneys-Air pico-examples % git submodule update --init
Next, make a directory named build in the pico-examples repository.
whitneyknitter@Whitneys-Air pico-examples % mkdir -p build
whitneyknitter@Whitneys-Air pico-examples % cd build
Set the path variable in the build directory to the locations of the GNU ARM toolchain and the RPi SDK on the host computer:
whitneyknitter@Whitneys-Air build % export PICO_SDK_PATH=../../pico-sdk
whitneyknitter@Whitneys-Air build % export PICO_TOOLCHAIN_PATH=../../../../../Applications/ArmGNUToolchain/11.3.rel1/arm-none-eabi
whitneyknitter@Whitneys-Air build % cmake ../
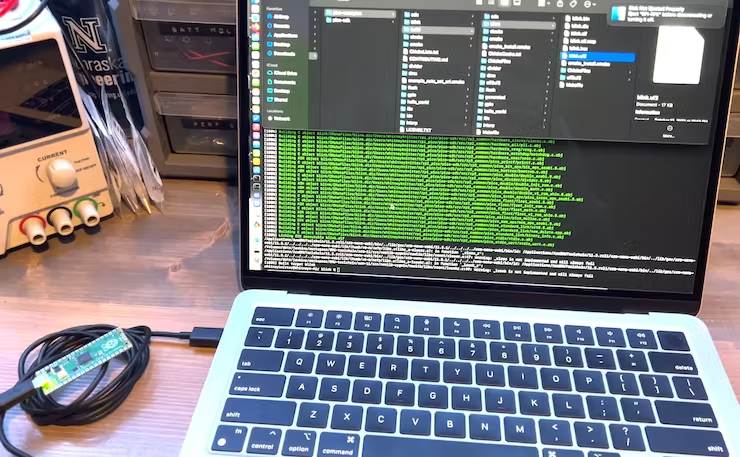
Change directories into the program you want to create and run make with the environment variables for the RPi Pico SDK and the GNU ARM toolchain specified. I used the blink LED here as a sample.
whitneyknitter@Whitneys-Air build % cd ./blink
whitneyknitter@Whitneys-Air blink % make -j4
This finally leads to the creation of all required output files in this directory, including blink.elf (for the debugger) and blink.uf2 (to flash the RPi Pico).
Put on RPi Pico
Drag and drop the binary data file (.uf2) for the built program to the RPi Pico after mounting it as a USB mass storage device is the simplest method for uploading code to it.
Holding down the RPi Pico's BOOTSEL button while connecting the micro USB port to the host computer will allow you to mount it as a USB mass storage device (my M2 MacBook Air in this case).
Then it will show up in Finder like a USB flash disc would. This is the location where the binary data file (.uf2) is dumped. Therefore, I'm dragging and dropping blink.uf2 from /rpi pico/pico-examples/build/blink to RPI-RP2 in Finder in this instance.
Run a program on an RPi or Pico
When the.uf2 file is dropped into the RPi Pico in Finder, the device will immediately flash and launch the program. Additionally, Mac OS will protest that the RPi Pico's USB mass storage device did not eject correctly as a result of this, but you may safely disregard this warning.
The RPi Pico's LED will begin blinking as soon as the "Disc Not Ejected Properly" warning appears, demonstrating that the blink program is successfully functioning.


.png)


